Tuesday, September 29, 2015

Tutorial : Crib Rail Protector

The Crib Rail Protector
When my nephew entered his teething phase he chewed on anything he could get his mouth on, including his expensive crib.  So much so that it looked like it belonged in a dog pound and not a toddler’s room.  I figured that we needed to do something to stop him from relentlessly eating his crib (and to protect my daughter’s crib, before she got her mouth on it).  Cue: the crib rail protector. 

What you’ll need:

The Basics (machine, pins, thread, ruler, scissors)
2 yards of your choice of fabric (though I made mine with only a yard and piece it together to get the right length)
2 yards of your choice of coordinating ribbon
1.5 yards of batting (60 in wide)


First:  Prepare your ribbons, buy cutting 8 pieces 9 inches long. 


Burn the edges of the ribbon quickly with a lighter to seal the end so it doesn’t fray


Cut 2 pieces of fabric 15” x 54”   (If you’re using less than 54” of fabric, I just pieced mine together to make that length, it only took 1 yard completely of fabric)


Cut your batting (depending on how thick yours is to begin with will determine how much you’ll need.  I used 3 layers of   1/4 inch batting.)


Face both fabric pieces right sides together.  Then stack those on top of the batting

Insert your ribbons in between the right sides of fabric.  4 on each side, one 2 inches from each edge and then about ever 16 inches from there on (making sure to match them up for the opposite side.)


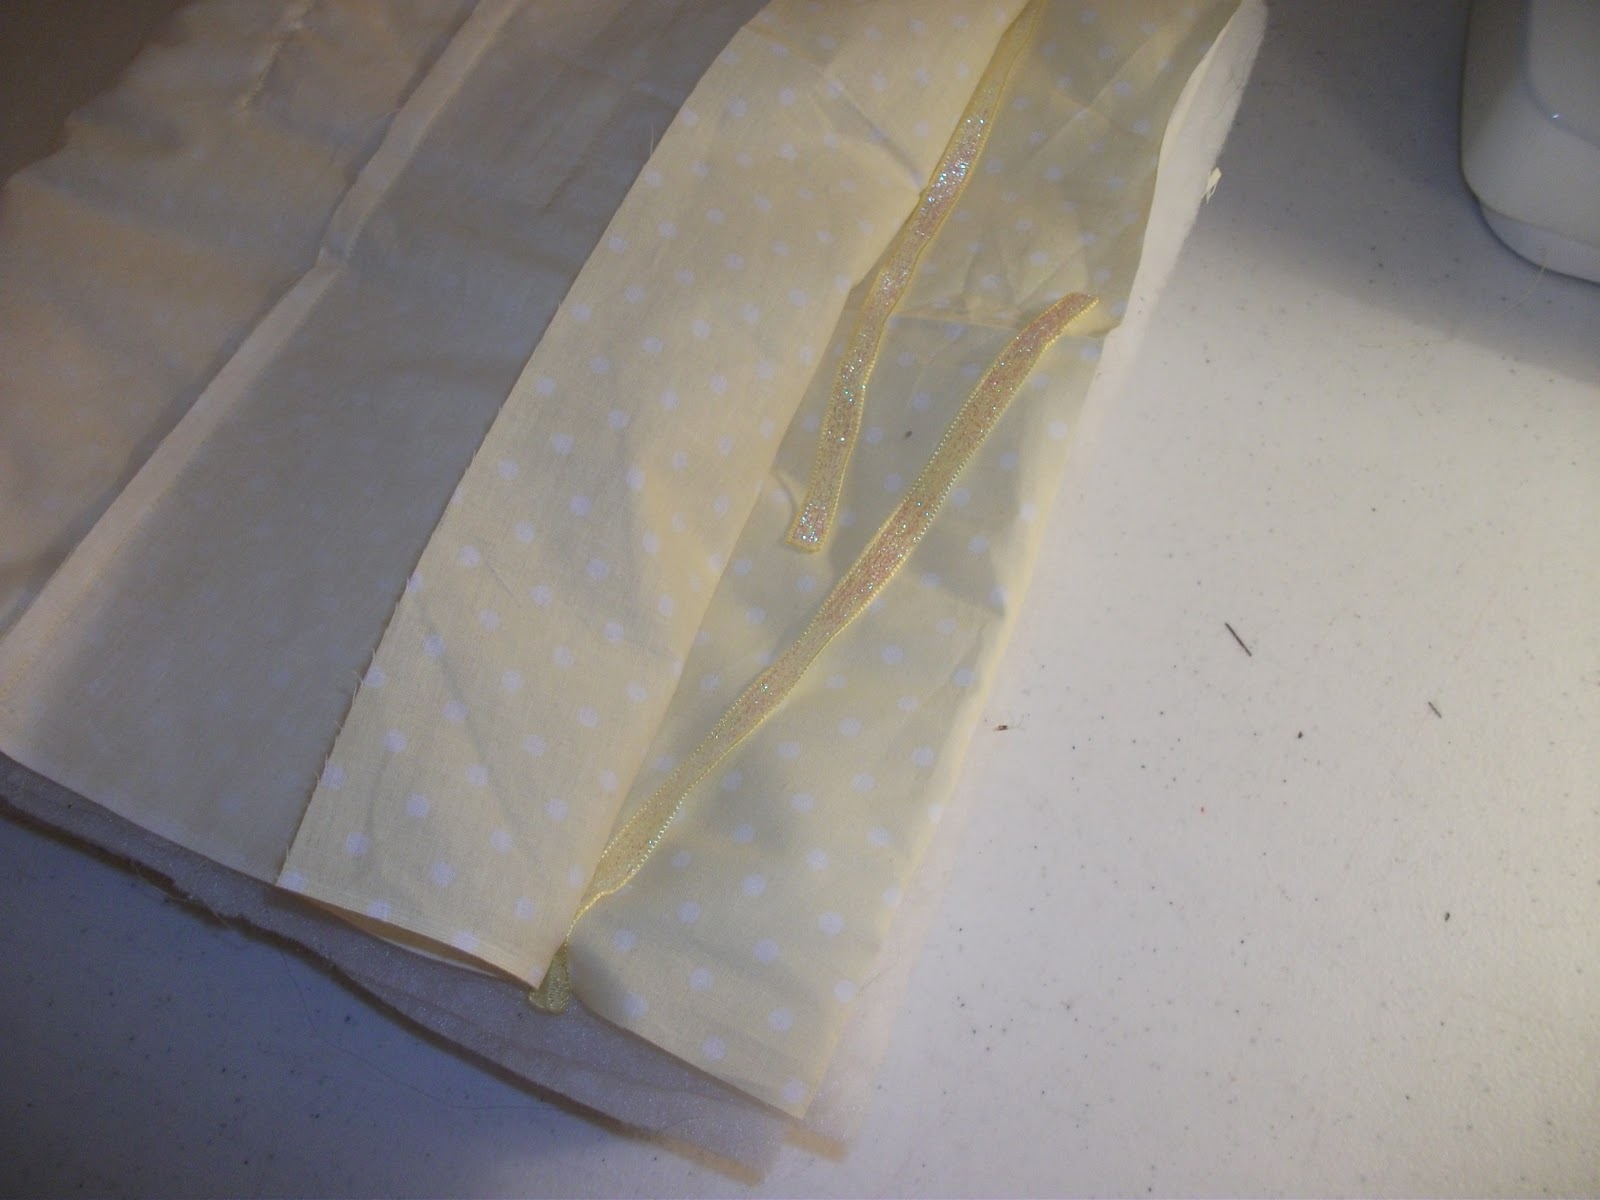
Sew around the edge, leaving a few inches open at one of the short ends.  (I used a 1/2 inch seam allowance)  and trim your corners


Flip it inside-out and iron flat, 
(its like birthin' a baby)

top stitch the open side (you could also hand stitch this, but I was going for quick and not worried so much about neat, heck, baby is going to be slobbering all over it)


(finished Product)

Then attach to the crib, make sure you tie the bows tightly so they can’t come loose.


I added a pocket (mostly to cover the seam) for paci storage.

We can NEVER find paci’s in the middle of the night when we need them, so this helps immensely. 

Saturday, September 12, 2015

Tutorial: Taggy Ball


 You know all those baby birthday parties you go to? When the child gets 10 of  the same. exact. thing?  I hate that.  So I love making personalized gifts and toys for them.  its a one of a kind think and (if they like it enough) they'll cherish it forever.  this is one of those project.  I made this for my nephew for his first birthday party a few years ago, and even now that he's 5 and in kindergarten, they STILL have it. 


For this project you’ll need:
            Sewing basics
            Ribbon (several kinds if possible)
            2 coordinating fat quarters
            Poly-fill

I started by cutting my patter out. (Email me at sewbynightdesigns (at) yahoo (dot) com if you want mine, or print the picture of it at full paper size) or you can make your own using my formula. 

Therefore if your height is 9 inches, you width at the fattest point will be 3 (6 inches high, 2 inches wide, and so on)  make sure your top and bottom is about 1 inch wide (2 half inch seam allowances) 

After you get your pattern right cut out 3 pieces of each fabric, you’ll have 6 pieces total.

Using one of the fabrics, attach a few taggies to each side.  This is where you can get creative (I made loops of ribbon, cutting each ribbon piece 2.5 inches long and folding in half.)    Pin each tag with the cut edges against the outer edge of the fabric, loops towards the middle. 

Start by taking one of each fabric and running a line of stitches along one side with a 1/2 inch seam allowance (I double stitched this to give the seams strength so he couldn’t put out the tags).

This is what it looks like when you open the seams

Continue to add panels alternating fabrics like this

Until you’ve attached all the panels together in a line (don’t finish the circle though).

Editor’s note:  make sure your seams meet on the top and bottom so there won’t be a hole in the ball.  If you don’t, (and make the same mistake I made) just gather all the pieces and run a seam across here:

Flip the ball right sides:

and stuff it (I like poly-fill.  Since it will probably go in the mouth and get wet, the polyester stuffing dries quicker) then hand stitch the final edge closed. 


And there you go! A Fun toy for baby in less than half an hour.

Thursday, September 10, 2015

Tutorial: Easy Peasy Burp Cloth Pattern and Tutorial

I have a bunch of tutorials that I published on my old blog, and since rebranding myself to ARK Designs/ Designing Mommy, they've kind of fallen away, so I figured id start pulling on over from that page every now and then until they're all on this blog instead of that one (especially since they're so weird pop ups attached to that one that weren't me and I have no clue how to get rid of them) so without further ado... The Easy Peasy Burp Cloth Pattern!

Like most moms of newborns, it became necessary to protect my clothes from constant burp-ups (kinda like spit-up, but its that gorge of milk that comes back up when burping, usually followed by a giggle and a smile from baby, but a grrrrr from mommy).  I found myself just grabbing anything I could: receiving blankets, towels, or random clothing pieces.  I soon realized I didn’t have any true burp cloths, so I when to making one.  When, in the design phase, I decided I’d like a shoulder contour for maximum protection, this I what design surfaced.  And this is crazy simple.

What you’ll need:
            The basics
            The Pattern
            1/2 yard of terry cloth (or fleece)
            1/2 yard of cotton or flannel of your choice

I started by cutting one of the pattern (one the fold) of each fabric.

Stitch all the way around leaving a 4-5 inch hole on the one side (long straight side)

Notch the curves

Flip and iron

Top-stitch around the edge at 1/2 inch seam allowance

Easy-peasy-done.   I used matching thread to my flannel fabric for the whole thing, it gave the white terry side a pop of color.

Monday, November 18, 2013

Sweet Bonnie by Shwin Designs

I absolutely love testing for Shauna from Shwin designs, her designs are adorable and completely wearable, this pattern was part of the Pattern Anthology winder wonderland collection. 

the first thing I thought when I saw this pattern was AHHHHHH! ZIPPER!!!! After my heart attack subsided, I jumped into this pattern and the zipper was seriously no big deal AT ALL.  the visible zipper was put in, in such a way, that it is completely child's play. I love this top and it took me literally one and a half hours to complete, start to finish, with my children expecting me to actually.... parent.... them.  the collar is just enough vintage to make me happy and it is just loose and flow-y enough to be play worthy that makes my daughter happy.  so here are some pictures!!


Madonna Ruffle Tunic from Shwin Designs

 
A while back I did a pattern for Shwin Designs, one of my ALL TIME favorite designers, and boy, did she hit one out of the park.  it is an adorable slouchy tunic with an adorable ruffle bottom.  I made it with a 4-way stretch knit material, it drapes very nicely, but its a bit heavy for this pattern (because of all the ruffles), at least on the size 2 that I made.  the pattern was super easy to sew up and was very easy to follow.  it would be a GREAT first time knit sew-er project.  so without further a-do, some pictures :)


as you can tell, VERY playtime worthy and she absolutely loves it.  And I have to admit, it goes great with the motorcycle boots she refuses to ever take off :)

Friday, August 30, 2013

Pattern Review: Dandelions n' Dungarees Classic Ruffle Dress


I recently purchased the Classic Ruffle Dress from Dandelions and Dungarees, and boy is it adorable. It comes from a relatively new designer, but the pattern is well written and explained and has great pictures. I expect a lot of great patterns to come from her J

From cutting to completion the dress took me a bit longer than a simple dress- about 3 hours- but most of that was in the cutting… there are A LOT of parts to it.. But don’t be discouraged, it does go together quickly and it is fairly easy (with exception to the *gasp* BUTTONS!!) there were only a few actual pattern pieces, but the rest of the parts (skirt, button plackets, ruffles, waistband, etc) were given as measurements… which in my opinion are SO much better, since printer paper and ink are in high demand around this house. The pattern pieces were very well organized and professionally digitized.

I’d consider the pattern good for beginners/intermediate- only because of the button holes, but you could easily do snaps in place - which are definitely easier. It didn’t have any really difficult sewing techniques. And boy, did it come together nicely. It seriously was the closest to ready to wear (RTW) clothing I found in sizing (normally if I make a 2T for my almost 3y she SWIMS in it. But I took the change and tried (Since it’s the smallest the pattern goes at this point- from what I understand she’s working on expanding the sizes). The only thing I did do to customize the fit of the dress was to do shirring (elastic thread) across the back waistband. It tightened the waist up just enough to fit perfectly.

When cutting the fabric, I also made my skirt pieces 36inches long, instead of the listed length for my size (because I was lazy, and my fabric was already cut to the 36in, why cut it any more… haha) it made the skirt a little more fuller and is just adorable. My daughter loves to spin around in it and swish the skirt. Though, my pattern/measurement alterations were definitely not necessary, actually, this might be the first (maybe even only) pattern that I did not change anything about when putting it together- for me, that is saying A LOT.

And just to let you know the fabric, the print line is called 1001 peeps, I’m not sure of the manufacturer of the fabric, but is gorgeous. My daughter loves the towers on it, she calls it her castle dress.

So in conclusion, you really MUST get this pattern, and all other pattern she puts out in the future for that matter, this is a good one, and is Perfect for back to school. My daughter will be wearing it to her first day of preschool in a few week…… but that’s a completely different post for a different day.


Pattern Review: See Kate Sew- Sugarplum top

 
So those who know me, know that I'm fairly well versed in sewing techniques, but I must admit, I’m a lazy seamstress. I love easy projects that don’t call on all my knowledge, one of the many reasons I LOVE this pattern from See Kate Sew. The Sugarplum top is a quick sew and perfect for the beginners out there. There are no difficult closures but it is a very stylish top, which is great because when it comes to easy and quick you’re usually stuck with peasant dresses and pillowcase dresses- though completely cute, are not nearly as fashion forward as this adorable top.
The pattern consisted of pattern pieces you cut out (even the rectangle for the skirt). I loved that the pattern piece for the collar pieces were NOT nested, with a piece that small, I have trouble following the correct line (considering my printer ran out of colored ink months ago). It also included a fuller skirt option to make it more full. From start to finish, including cutting, ironing and sewing, I had this project done within 2 hours, that’s with a rambunctious 2 year old bothering me every 20 seconds. I would say a experienced seamstress could get it done quicker, and a beginner, not a whole lot longer.
 
The only tricky part of the entire pattern was stitching the collar to the lining piece after, it is all attached together- though this could easily be skipped (instead of doing it the way it was written in the pattern, I just topstitched the entire way around the bodice (arm holes and neck opening) I just made sure to flip the collar up when I was topstitching that area (basically topstitching under the collar through all the layers). The top closes by ribbon ties at the shoulders- so easy compared to zippers or buttons. Though admittedly, I did not use ribbons, my daughter doesn’t like ribbons by her neck- so Instead I did plastic snaps (a hit around our house).

The top did fit quite loose on my skinny-mini, I made a size 2t for her, but probably gotten away with smaller, but I was bad, I didn’t go off of the given chest measurements- I told you I was lazy. I just went off of what size she wears “ready to wear” size, which it seems to run a bit bigger than (so yes, MEASURE your child). Though even my mistake was easily fixed. It was super simple to just take in the side seams a bit more than the given seam allowance.
 
I seriously LOVE this top. I have plenty of plans to make more in the future. It would be great as back to school tops in those warmer months. She gives you ideas about changing it up with bigger collars, no front ribbon etc. I plan on trying it next with a larger collar, maybe a big pointed collar as opposed to the peter pan collar. It works GREAT for play time. The only downside for WAHM’s out there, is that the pattern requires a license in order to sell items made of the pattern- but I think the cuteness far out-weight this.
 
I used quilters cotton from the Joann Fabric quilter’s showcase line. I fell In love with this fabric at the store, and a plus, it’s a fairly inexpensive fabric at that. When it comes to fabric choices, I’d stick to a quilters cotton or the like for beginner, but as a more experience seamstress, I’d love to try it out in a silky fabric for an dressed-up, flow-y (is that a word?) finished project.
 
But in conclusion, this pattern from See Kate Sew is A-DOR-ABLE. I’m so glad I gave this new-to-me designer a chance! I’ll definitely be purchasing more patterns from See Kate Sew.