Wednesday, July 3, 2013
Pattern Review: Delaney Tunic/Dress by {Sig}nature Creations
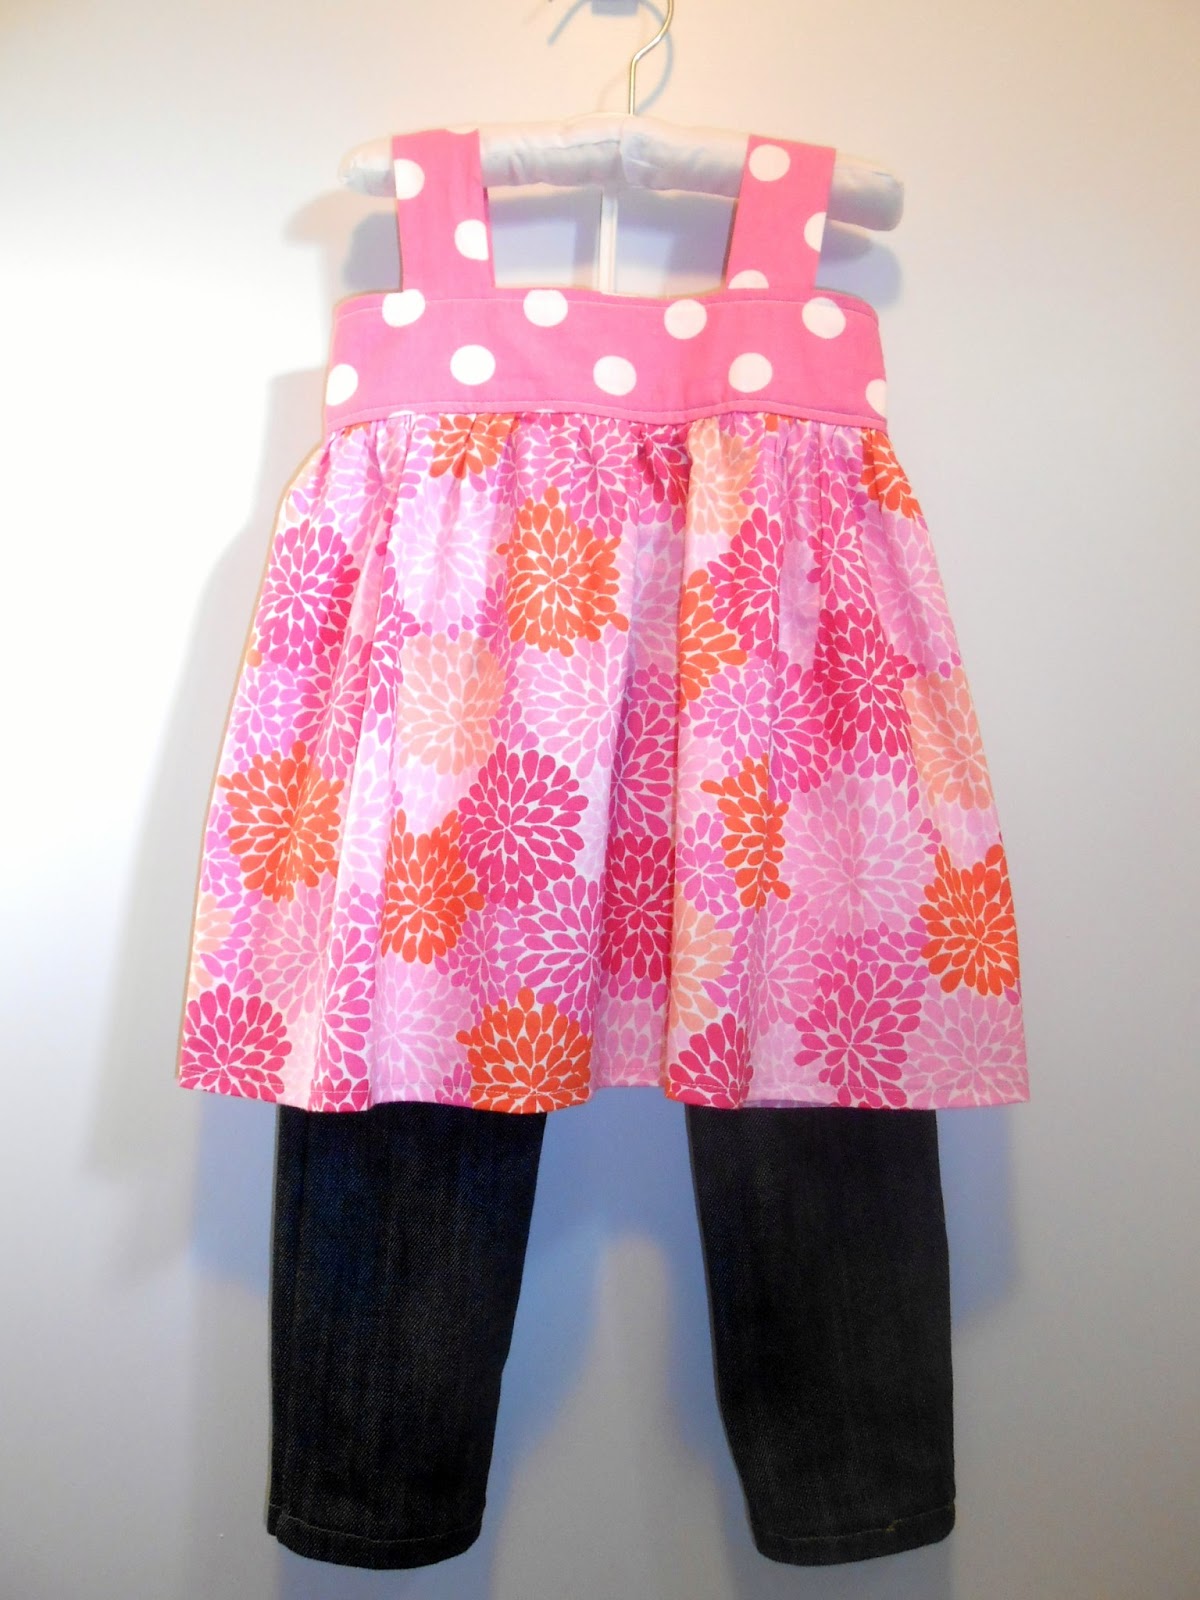
I recently folded to the peer pressure and purchased the {Sig}nature Creations Delaney Tunic/dress pattern. I’ve been seeing it EVERYWHERE lately, it’s the new “hot” pattern. And truly it did not let me down, I made one fore my daughter and it is stinkin’ adorable!
It was super easy and definitely someone with beginner skills could figure it out, there are lots of helpful pictures in the tutorial of how it’s put together. It is also a super quick project so if you’re like me and decide you’re little girl needs a new outfit the day you need to be at a party/special trip/ whatever, you could definitely get it done super quick. It took me about an hour from picking fabric to cutting and sewing. And seriously I just LOVE how it turned out.
If you are super crafty (and good with pattern drafting, based on measurement) you probably don’t NEED the pattern, basically you are given the measurements for the parts, because they are all rectangles. I know I can, but If you’re sewing for a boutique (like I plan to in the future) its definitely worth the investment, since it has the measurements for the pieces for sizes 0-6m all the way to size 8 (and she even just released a second Delaney pattern for sizes 8y to 16y (so all the way up to almost adult sizes!!!).
I finished it differently than the pattern is intended, my daughter isn’t thrilled with bulky bows on her back, so I extended the band and added snaps in the middle, but, next week, I hear, she’s going to be releasing the add on pattern, which gives 3 more ways to finish the closures, a different type bow, a button closure, and a lace up closure. All of them look super cute and my daughter will be getting more in each closure one I can pick up the pattern.
So final verdict: GET THIS PATTERN! Its seriously adorable. And versatile enough to be worn all year round, summer without anything under, and fall/winter/spring with a shirt under like an apron/pinafore. (shown with the Skinny Jeans from Peek-a-Boo Pattern Shop)
Tuesday, June 18, 2013
Jessica Halter top Tutorial for 18in dolls
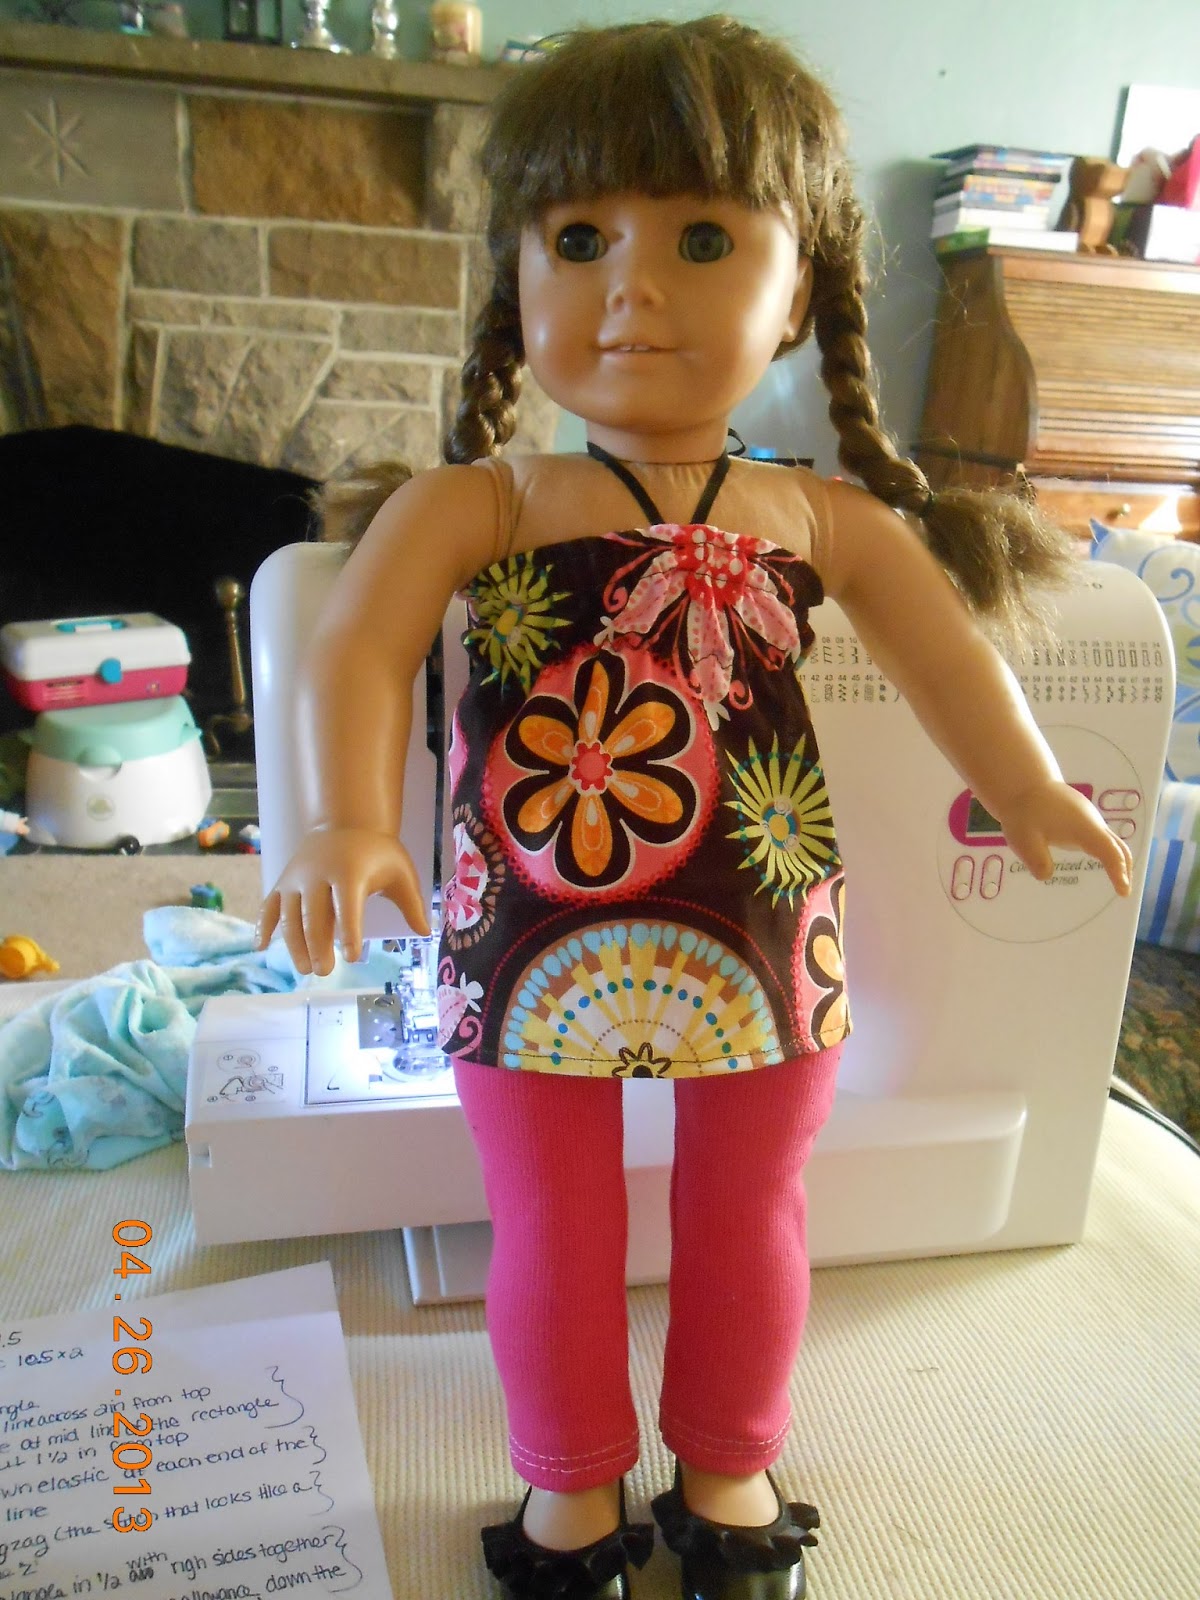
A few months ago, we were cleaning out my attic in order to make some room for a craft room for myself sometime in the future…. Probably after it stops being 105degrees up there, because without air conditioning, I couldn’t even bribe my (very helpful) husband to assist me with it. It needs outlets put in, flooring and walls… so just about everything. When I was up there with my daughter, she found my old American Girl doll from... ohhhh 20 years ago, haha. It was the original Molly, and line my irresponsible childhood, it only had one of the outfits (out of the say 10 my parents had bought me). But Mags was hooked! She’s been carrying it around everywhere ever since. She asked me one day for a dress for her and I started looking around for free patterns, to find… there aren’t all that many. So here is my first in a series of completely FREE American Girl (18in) doll patterns this is the Jessica Halter top, its paired with a pair of simple leggings, I’ll post the pattern/tutorial for those tomorrow Enjoy!
What you’ll need:
15x7in scrap of fabric
2 pieces of 1/4in elastic, 10inches long each
18 inches of ribbon
Start by laying the piece of fabric right side down and along the long side, draw a line along the legnth 3inches from the top, the mark at the center of that line
On that line, tack down one of the pieces of elastic at each end of the fabric.
Fold the piece of fabric in half width-wise and stitch a seam to make a tube out of the fabric
Fold down the top length of the fabric piece 3/4in and run a line of stitches right along the fold all the way around, then another right below that 3/8in away from the last row of stitches. Leave about a 1 inch space open in this stitching.
Using a safety pin, thread the second piece of elastic through the casing, attach the ends of the elastic together and tuck that back into the casing. Close the hole you left open in the stitching.
Find the center point you marked. Lay the ribbon perpendicular to the lines of stitching, with the center of the ribbon at the bottom row of stitching of the elastic casing. Tack down the ribbon by stitching over it on keeping your stitches on the line of stitching below it.
Hem the bottom of the halter and you’re done!!! Tomorrow I’ll post the tutorial to the legging that make a perfect pairing with this adorable summery halter
What you’ll need:
15x7in scrap of fabric
2 pieces of 1/4in elastic, 10inches long each
18 inches of ribbon
Start by laying the piece of fabric right side down and along the long side, draw a line along the legnth 3inches from the top, the mark at the center of that line
On that line, tack down one of the pieces of elastic at each end of the fabric.
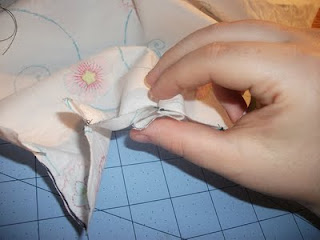
Pulling the fabric flat (stretching the elastic) use a 3 step zig-zag (the zig-zag that looks like its dotted) stitch down the center of the elastic (keeping the stitching on the elastic)
Fold down the top length of the fabric piece 3/4in and run a line of stitches right along the fold all the way around, then another right below that 3/8in away from the last row of stitches. Leave about a 1 inch space open in this stitching.
Using a safety pin, thread the second piece of elastic through the casing, attach the ends of the elastic together and tuck that back into the casing. Close the hole you left open in the stitching.
Find the center point you marked. Lay the ribbon perpendicular to the lines of stitching, with the center of the ribbon at the bottom row of stitching of the elastic casing. Tack down the ribbon by stitching over it on keeping your stitches on the line of stitching below it.
Hem the bottom of the halter and you’re done!!! Tomorrow I’ll post the tutorial to the legging that make a perfect pairing with this adorable summery halter
Thursday, June 13, 2013
Anchors Aweight Sailor Romper
I recently had the pleasure of pattern testing for Peek-a-boo Pattern Shop, and ho-ly smokes is it cute! When I threw in my hat to be a pattern tester for this adorable little pattern, I wasn’t sure that I’d actually be picked, in fact I thought for sure that I wouldn’t be because her patterns, being as adorable and comfy as they are (and trust me I have many, many of them which are hits with my little girl) there is usually quite a few people (read that as HUNDREDS) of people jumping up and down with their hands raised offering to be tester. So when I got the email asking to test, I. was. THRILLED. Especially since it was for a BOYS outfit, and a cute one at that. If you aren’t aware, and I’m sure if you have looked at any of the PDF pattern makers on the market, boys patterns are few and far between, and most of them of the same ‘ole thing time after time.
When I opened up the pattern and got to reading it I realized just how easy it really is! A beginner could definitely do this- thought there are the dreaded….. Button holes. With which I have a love/hate relationship. To be absolutely truthful, I only did buttons on the front of the shorts, the back of the shorts and the shirt I did plastic snaps, which suit me much more. Admittedly, I was kind of worried about doing button holes though the elastic I had chosen, since it was a really think elastic and my machine hates that elastic to begin with. Though I’ve heard from others that their elastic button holes when great! So don’t let keep you from trying them!
Here are a few adorable pictures of my son in the outfit. I think I’m going to make another one (or four) for him. They were very true to size and I can imagine you could use just about any woven fabric. I really wouldn’t do knit with it. I made mine using a light weight shirting fabric because it gets super hot and muggy here in Pittsburgh but it would be divine in a heavy fabric like twill or denim.
Verdict: BUY THING PATTERN!!! (in a later post, I’ll show how cute it looks on little girls too!)
New post to come
Hey! I wanted to let you know what’s to come! I’ve been SUPER busy over in my neck of the woods getting this ready to reopen this blog… since I got totally underwater for a while when my son was born (and still had my very… spirited… toddler). I’ve been drafting a bunch of FREE 18in doll patterns (yes, I said absolutely free). I’ve also been sewing up as storm for my daughter. Since I absolutely LOOOOVE sewing, therefore, all of her clothing for the next season/size. I’ve been researching fun and function, cute and comfortable clothing for her and THINK I finally found the best patterns. I’ll even be reviewing a lot of them. So you’ll hear just what I think of them (and I have quite a collection) these will be very honest review, I bought them all, didn’t get any free for my review, so you can guarantee I’ll be honest. I all have been pattern testing and of course, will feature those items on my blog. Because lets to truthful… they are freaking adorable! Anyway, here are so pictures of what’s to come!!
FREE 18in DOLL PATTERNS
Jessica Halter top and Simple leggings
Emily Dress
Jenni Ruffle Skirt
AG Bolero
PEEK-A-BOO PATTERN TEST- ANCHORS AWEIGH ROMPER
ALL DOLLED UP PATTERN TEST
Thursday, August 2, 2012
A Quick (and cheap!) Outdoor Update
I love my house. a lot, it’s a 1950’s cape cod style house, and its adorable. I have an awesome front porch with a cute porch swing that we use all the time. The exterior of the house is a unique red brick with mix of black bricks thrown in every now and then. I looooove the bright red brick, I hate those weird orange brick houses, and wouldn’t know the first thing about painting brick houses, so I’m glad I lucked out.
Anyway, the outside of my house, even being as cute as it is, is a bit boring. I have all these ideas to change the look of the front, but, I’m tired, I have a toddler (who loves to “help”) and am pregnant, so I need a quick and easy project to appease me. I’ve always wanted to have a bright colored front door, but never knew what color to go with, I was so worried that it would be the wrong color, so in turn, I just let my boring white door stay. After a while I seriously became fed up with it, so I decided to act. I had this idea that a light blue would be a perfect color, it wouldn’t fade in, but it also wouldn’t be too… weird. I did buy a back up plan- charcoal, and also had left over white, from another project. But after finishing up the one coat of blue, I seriously FELL IN LOVE! (I went on to finish a couple more coats, obviously) but I didn’t need the extra colors, this one was perfect. And even better, the entire project cost me only 6 dollars! I bought 2 jars of the paint samples from lowes, I probably should have bought the exterior paint, but seriously, that would have cost ATLEAST twice as much, I’m cheap. I figure that with the storm door, its not going to be getting the rain, so I didn’t have to worry so much. In a year or two if I’ve changed my mind paint is easy to cover up. So here it is! voila! Don’t you just love it!
Next up on the front porch, getting rid of the HIDEOUS grey indoor/outdoor carpet on the front steps!
Enjoy!!
Tuesday, July 31, 2012
Snappy Baby Romper
I love this little number. I'd also be lying if it wasn't inspired a bit by the Snappy Toddler Top from Prudent Baby, which is also one of my favorites. Though, with this i made a thicker neckline yoke, which i prefer the look of, but seriously, who wouldn't love a baby in this outfit!!!
To make this, I used an old sheet I had, which I love, i've used it for other projects, and have a lot left still!
split center with the center front pleat loop and pin Fold the outer pleat loops toward the middle, pin.Using the back body piece, both back pleats will be done the same, fold and meet pleat lines with right sides together. Do a few stitches to tack the pleat. Fold the pleat loops toward the center of the body piece, pin.
On both front and back body pieces, baste across the top at a 1/8th inch seam allowance to fix the pleats in place
For the front and back yoke pieces, there are 2 different ways you can complete the circular necks for both the first step is the same; starting at the markings, back stitch and stitch towards the outside of the yoke, around the top and finish (with a back stitch) at the other mark. The first way, you can clip the curves, flip it and fold/iron under the edges. The other way would be to complete it the same way that in the previous post, basting across most of the opening, clipping the curves, turning and ironing. Then seam ripping the basting edge, leaving a neatly folded over edge. Do this for both the front and back yoke pieces.Taking both front and back body pieces, stitch them together on both the sides at a 3/8th inch seam.
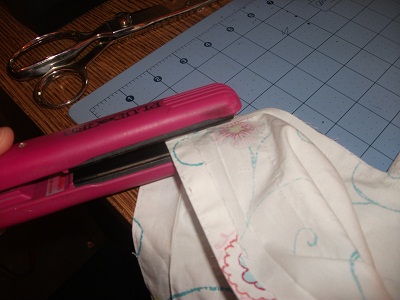
Fold and iron the seam flat- for this I usually use my handy dandy flat iron that I’m too lazy to use on my hair.

Hem the leg bottoms by folding it 1/4inch and iron; then 1 inch and iron. Make one row of stitches just under the hem amount. About 7/8 inch seam allowance, then again at 1/2inch seam allowance from the bottom, under it.
Measure around the baby thigh to get the length of elastic needed per leg hole. Using a safety-pin lace the elastic through the casing we just made, tacking it down at each opening.

To finish off the arm holes, apply bias tape around the edge, I usually prefer home made, since it’s A LOT cheaper and comes in prettier colors when you get to choose it. But I had a little left over bought stuff, so I just used that instead. Visit Dana Made It Blog for a tutorial on making and sewing bias tape.
To apply the yoke to the body pieces, insert the body piece into the appropriate yoke open that we seam ripped. (front with front, back with back). Make sure there is about 1/2inch of the body piece inside the yoke.
Pin.Stitch across the opening to finish the top at approximately a 1/8inch seam allowance. Stitch around the entire yoke at this seam allowance. Do the same for both front and back yoke pieces
To finish the bottom of the romper, use inseam lining pieces. Take two of the pieces and line up. Stitch around the edges at 1/2inch seam allowance.
Clip the curve. (for this, I much prefer using my pinking shears, cutting close to the line of stitches. It provides a quick and uniform clipping).
Flip it inside out and iron. Do the same at the previous 2 steps for the remaining two inseam lining pieces.
Line up the inseam lining pieces with the unfinished bottom seam, there will be hang over on each side. The pieces should be lined up on the right side of the fabric. Pin.
Stitch the inseam at 1/4inch seam allowance. Clip the curve..
On both front and back body pieces, baste across the top at a 1/8th inch seam allowance to fix the pleats in place
For the front and back yoke pieces, there are 2 different ways you can complete the circular necks for both the first step is the same; starting at the markings, back stitch and stitch towards the outside of the yoke, around the top and finish (with a back stitch) at the other mark. The first way, you can clip the curves, flip it and fold/iron under the edges. The other way would be to complete it the same way that in the previous post, basting across most of the opening, clipping the curves, turning and ironing. Then seam ripping the basting edge, leaving a neatly folded over edge. Do this for both the front and back yoke pieces.
Fold and iron the seam flat- for this I usually use my handy dandy flat iron that I’m too lazy to use on my hair.
Hem the leg bottoms by folding it 1/4inch and iron; then 1 inch and iron. Make one row of stitches just under the hem amount. About 7/8 inch seam allowance, then again at 1/2inch seam allowance from the bottom, under it.
Measure around the baby thigh to get the length of elastic needed per leg hole. Using a safety-pin lace the elastic through the casing we just made, tacking it down at each opening.
To finish off the arm holes, apply bias tape around the edge, I usually prefer home made, since it’s A LOT cheaper and comes in prettier colors when you get to choose it. But I had a little left over bought stuff, so I just used that instead. Visit Dana Made It Blog for a tutorial on making and sewing bias tape.
To apply the yoke to the body pieces, insert the body piece into the appropriate yoke open that we seam ripped. (front with front, back with back). Make sure there is about 1/2inch of the body piece inside the yoke.
Pin.Stitch across the opening to finish the top at approximately a 1/8inch seam allowance. Stitch around the entire yoke at this seam allowance. Do the same for both front and back yoke pieces
To finish the bottom of the romper, use inseam lining pieces. Take two of the pieces and line up. Stitch around the edges at 1/2inch seam allowance.
Clip the curve. (for this, I much prefer using my pinking shears, cutting close to the line of stitches. It provides a quick and uniform clipping).
Flip it inside out and iron. Do the same at the previous 2 steps for the remaining two inseam lining pieces.
Line up the inseam lining pieces with the unfinished bottom seam, there will be hang over on each side. The pieces should be lined up on the right side of the fabric. Pin.
Stitch the inseam at 1/4inch seam allowance. Clip the curve.
It is Well with my Soul Printable
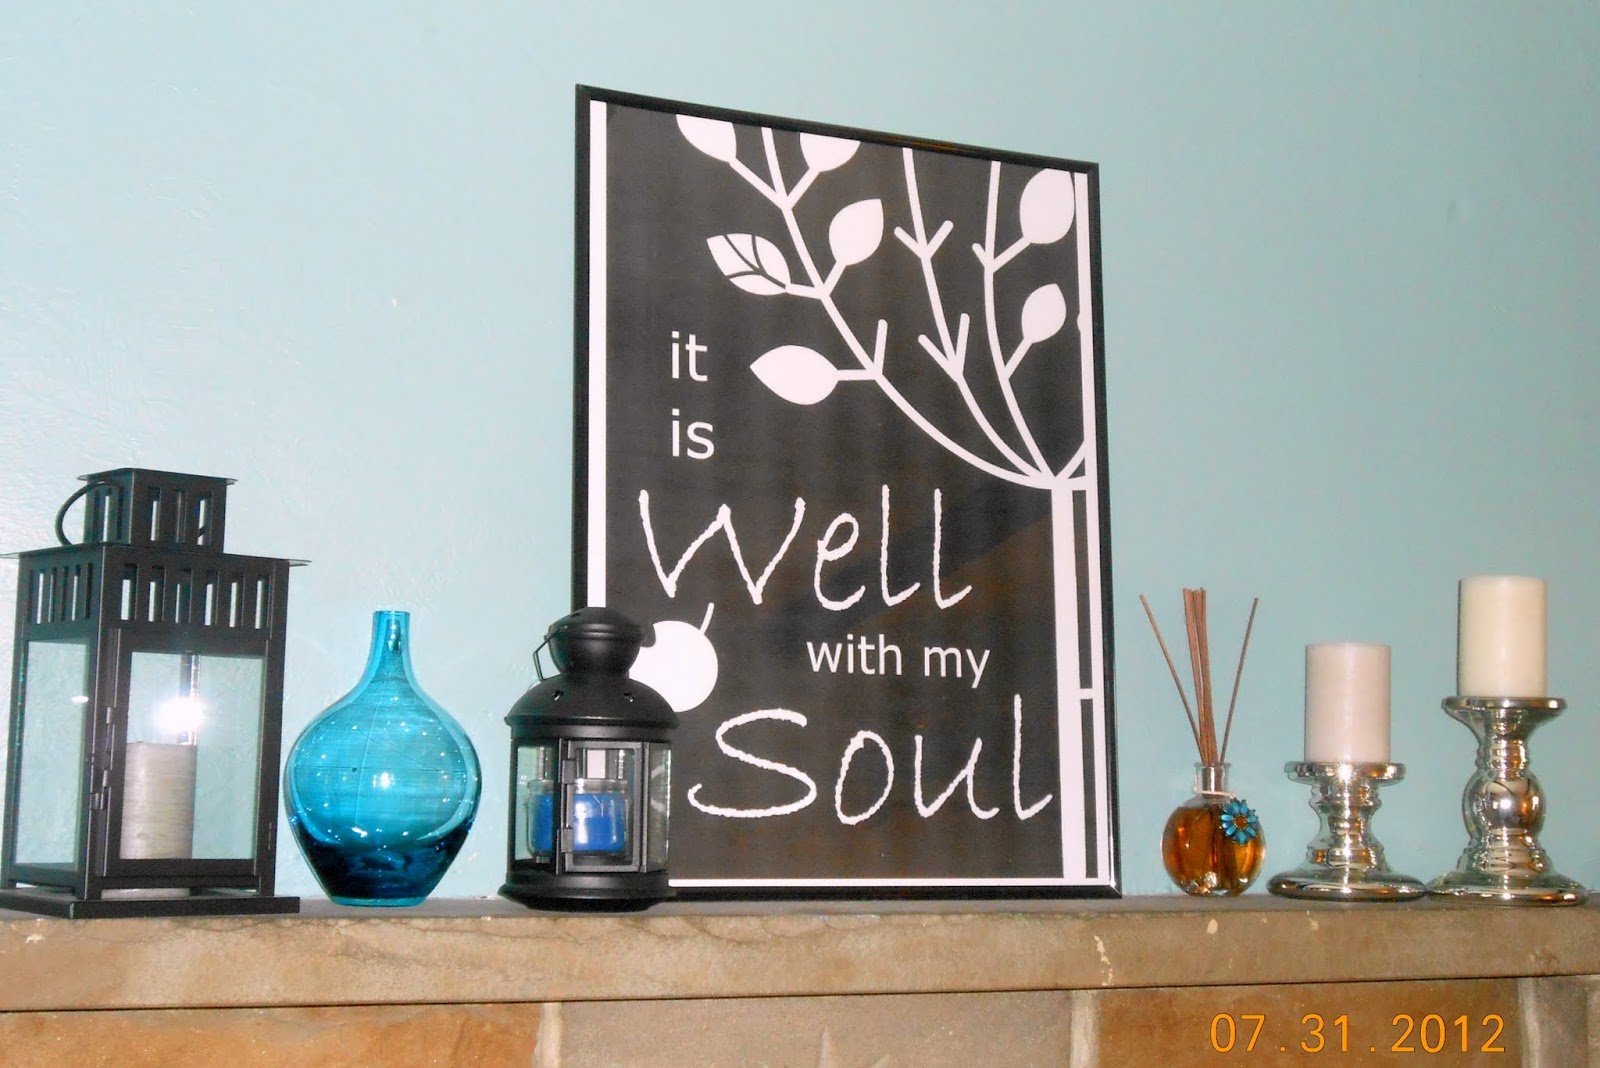
“It is Well with my Soul” is a very important hymn to me. I always loved it in church, but when my mom passed in May of 2011, it gave me the strength to move on for myself and my family, especially my daughter. She was my best friend and when I lost her, it was like losing the world. This hymn refers to 2 Kings 4:26, the meaning behind the hymn is a story of a Shunammite woman whose son died but was restored to life again because of her faith in the Lord. It is about dealing with loss, I hadn’t realized that, until I listened to the lyrics of it closer. But it can relate to the rest of life too, such as when your life is a mess, you can be well within your soul, if you ask the Lord for the help. I made this printable/poster, for about my mantle to remind me of this ever day.
I love the look of this printable, I LOVE how it looks on my mantle, but who wants to spend upwards of 30-60 dollars on one off of Etsy.com or the like. I made this poster for around 10 dollars. Seriously. And I’m talking EVEN the frame. It is just a cheap 18”x24” poster frame, I got mine from Joann Fabric for $7.49 (it was on sale 50% off) but sign up for their coupons, they ALWAYS have coupons, I actually use the mobile app, because I forget to carry the coupons, but ALWAYS have my cell phone. The print was really cheap too, I took the printable I designed, on a flash drive, to FedEx/Kinko’s and had it printed to fit my frame, they did all the hard work of resizing and EVERYTHING, and on top of that, it only cost $2.49 for the print.
I put it into the frame and arranged the rest of my mantle around it. And I have to say, I’ve fallen in love with it. And you can do it too! Here is a link to the printable, feel free to use it as you wish (but pretty please, don’t sell it yourself). Enjoy!
Subscribe to:
Posts (Atom)