Tuesday, June 18, 2013

Jessica Halter top Tutorial for 18in dolls

A few months ago, we were cleaning out my attic in order to make some room for a craft room for myself sometime in the future…. Probably after it stops being 105degrees up there, because without air conditioning, I couldn’t even bribe my (very helpful) husband to assist me with it. It needs outlets put in, flooring and walls… so just about everything. When I was up there with my daughter, she found my old American Girl doll from... ohhhh 20 years ago, haha. It was the original Molly, and line my irresponsible childhood, it only had one of the outfits (out of the say 10 my parents had bought me). But Mags was hooked! She’s been carrying it around everywhere ever since. She asked me one day for a dress for her and I started looking around for free patterns, to find… there aren’t all that many. So here is my first in a series of completely FREE American Girl (18in) doll patterns this is the Jessica Halter top, its paired with a pair of simple leggings, I’ll post the pattern/tutorial for those tomorrow Enjoy!

What you’ll need:

15x7in scrap of fabric
2 pieces of 1/4in elastic, 10inches long each
18 inches of ribbon

Start by laying the piece of fabric right side down and along the long side, draw a line along the legnth 3inches from the top, the mark at the center of that line
On that line, tack down one of the pieces of elastic at each end of the fabric. 
 
Pulling the fabric flat (stretching the elastic) use a 3 step zig-zag (the zig-zag that looks like its dotted) stitch down the center of the elastic (keeping the stitching on the elastic)
 
Fold the piece of fabric in half width-wise and stitch a seam to make a tube out of the fabric

Fold down the top length of the fabric piece 3/4in and run a line of stitches right along the fold all the way around, then another right below that 3/8in away from the last row of stitches. Leave about a 1 inch space open in this stitching.

Using a safety pin, thread the second piece of elastic through the casing, attach the ends of the elastic together and tuck that back into the casing. Close the hole you left open in the stitching.

Find the center point you marked. Lay the ribbon perpendicular to the lines of stitching, with the center of the ribbon at the bottom row of stitching of the elastic casing. Tack down the ribbon by stitching over it on keeping your stitches on the line of stitching below it.

Hem the bottom of the halter and you’re done!!! Tomorrow I’ll post the tutorial to the legging that make a perfect pairing with this adorable summery halter


Thursday, June 13, 2013

Anchors Aweight Sailor Romper


I recently had the pleasure of pattern testing for Peek-a-boo Pattern Shop, and ho-ly smokes is it cute! When I threw in my hat to be a pattern tester for this adorable little pattern, I wasn’t sure that I’d actually be picked, in fact I thought for sure that I wouldn’t be because her patterns, being as adorable and comfy as they are (and trust me I have many, many of them which are hits with my little girl) there is usually quite a few people (read that as HUNDREDS) of people jumping up and down with their hands raised offering to be tester. So when I got the email asking to test, I. was. THRILLED. Especially since it was for a BOYS outfit, and a cute one at that. If you aren’t aware, and I’m sure if you have looked at any of the PDF pattern makers on the market, boys patterns are few and far between, and most of them of the same ‘ole thing time after time.


When I opened up the pattern and got to reading it I realized just how easy it really is! A beginner could definitely do this- thought there are the dreaded….. Button holes. With which I have a love/hate relationship. To be absolutely truthful, I only did buttons on the front of the shorts, the back of the shorts and the shirt I did plastic snaps, which suit me much more. Admittedly, I was kind of worried about doing button holes though the elastic I had chosen, since it was a really think elastic and my machine hates that elastic to begin with. Though I’ve heard from others that their elastic button holes when great! So don’t let keep you from trying them!

Here are a few adorable pictures of my son in the outfit. I think I’m going to make another one (or four) for him. They were very true to size and I can imagine you could use just about any woven fabric. I really wouldn’t do knit with it. I made mine using a light weight shirting fabric because it gets super hot and muggy here in Pittsburgh but it would be divine in a heavy fabric like twill or denim.


Verdict: BUY THING PATTERN!!! (in a later post, I’ll show how cute it looks on little girls too!)


New post to come

Hey! I wanted to let you know what’s to come! I’ve been SUPER busy over in my neck of the woods getting this ready to reopen this blog… since I got totally underwater for a while when my son was born (and still had my very… spirited… toddler). I’ve been drafting a bunch of FREE 18in doll patterns (yes, I said absolutely free). I’ve also been sewing up as storm for my daughter. Since I absolutely LOOOOVE sewing, therefore, all of her clothing for the next season/size. I’ve been researching fun and function, cute and comfortable clothing for her and THINK I finally found the best patterns. I’ll even be reviewing a lot of them. So you’ll hear just what I think of them (and I have quite a collection) these will be very honest review, I bought them all, didn’t get any free for my review, so you can guarantee I’ll be honest. I all have been pattern testing and of course, will feature those items on my blog. Because lets to truthful… they are freaking adorable! Anyway, here are so pictures of what’s to come!!


FREE 18in DOLL PATTERNS 
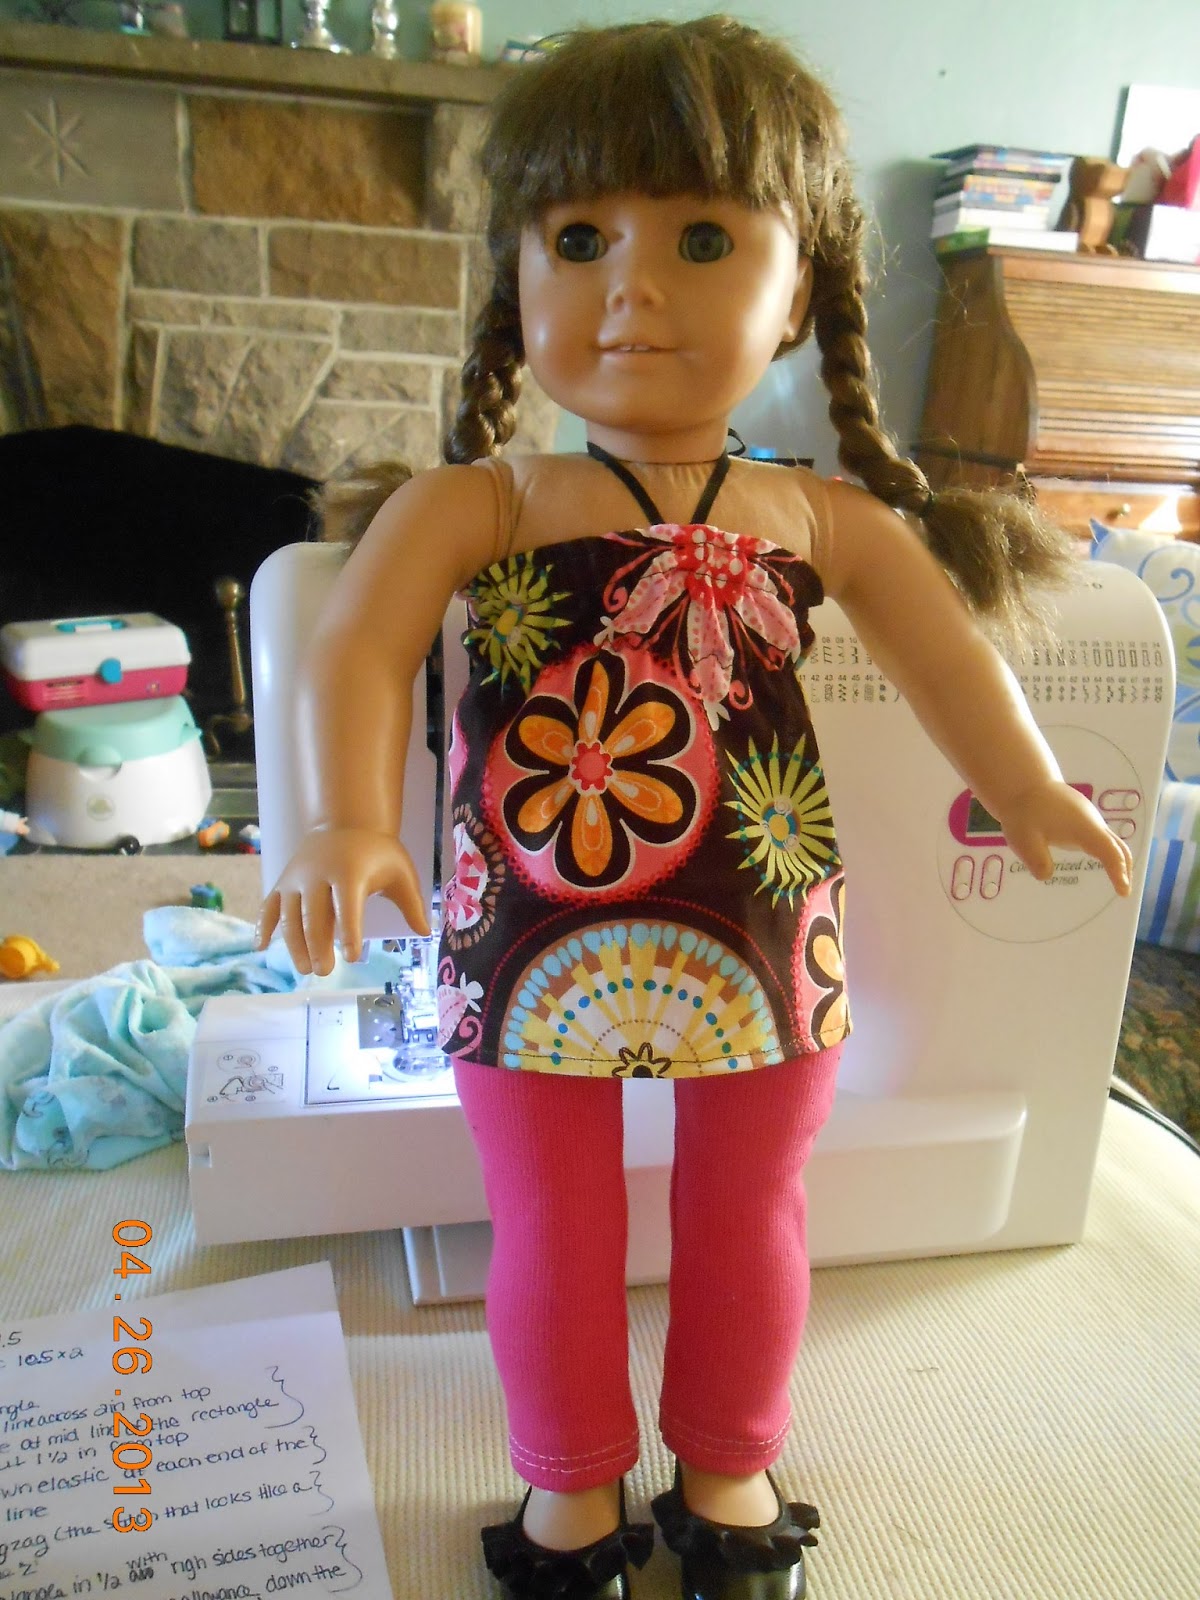
Jessica Halter top and Simple leggings

Emily Dress

Jenni Ruffle Skirt

AG Bolero
 
 
PEEK-A-BOO PATTERN TEST- ANCHORS AWEIGH ROMPER

 
ALL DOLLED UP PATTERN TEST